
Some standard trading indicators apply to any trading instrument, and the moving average is one of them. Beginners and professional traders alike are comfortable using moving averages to determine the market context and generate trade ideas, and most trading platforms support them.
However, there are several types of moving averages in the financial market, so novice traders may be confused when choosing one. This article introduces the Simple Moving Average (SMA) and the Exponential Moving Average (EMA) and which suits day trading, with trading strategies for each.

What are SMA and EMA?
A moving average is a standard technical indicator that calculates a series of price values over a particular period. There are diverse moving averages, including the Simple Moving Average (SMA), the Weighted Moving Average (WMA) and the Exponential Moving Average (EMA). Technical investors use moving averages on charts to determine the trend, its strength, support and resistance points, and often entry and exit points of trades.
You can calculate moving averages from various price values such as the opening price, closing price, highs and lows. For example, take a series of prices: $20, $22, $23, $24, $25, $26 and $28. The seven-period SMA is ($20 + $22 + $23 + $24 + $25 + $26 + $28) / 7 = $168 / 7 = $24. The primary difference between the SMA and the EMA is that the SMA puts the same weight on all values, whereas the EMA gives more weight to recent price changes. This makes the EMA more popular with day traders, as it reduces lag compared with the SMA.
How to use EMA in a trading strategy?
The moving average is a straightforward tool. You can use it to trade any instrument, including stocks, indices and forex. MA strategies are popular because you can apply them on any timeframe to obtain market context. A common practice among technical analysts is the MA crossover, which uses two or more moving average lines on a chart to generate trade ideas.
When the shorter MA crosses above the longer MA, it signals bullish momentum, and the opposite crossover signals bearish momentum. You can use this concept alone or combine it with other technical tools and indicators.
A short-term trading strategy
We use three EMAs to generate trade ideas in our short-term strategy. EMA 10 is the red line, EMA 20 is the green line and EMA 100 is the blue line. The blue EMA marks support and resistance, and crossovers between the other two lines suggest entry and exit points. The method applies to any instrument on any timeframe; we recommend a 15-minute chart for short-term positions.
Bullish trade scenario
Apply the EMA lines to your target asset chart and observe when:
- The red EMA crosses above the green EMA.
- The green EMA crosses above the blue EMA.
- The red and green EMAs both head upward and stay above the blue EMA.
Entry
When these conditions match, there is sufficient bullish pressure on the asset price. Open a buy position.
Stop loss
The initial stop loss goes below the bullish momentum.
Take profit
Continue the buy trade while the bullish momentum remains intact. Close the buy position when the red EMA crosses below the green EMA.
Bearish trade scenario
Apply the EMA lines to your target asset chart and observe when:
- The red EMA crosses below the green EMA.
- The green EMA crosses below the blue EMA.
- The red and green EMAs both head downward and stay below the blue EMA.
Entry
When these conditions match, there is sufficient bearish pressure on the asset price. Open a sell position.
Stop loss
The initial stop loss goes above the bearish momentum.
Take profit
Continue the sell trade while the bearish momentum remains intact. Close the sell position when the red EMA crosses above the green EMA.
A long-term trading strategy
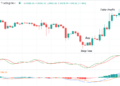
We use the golden and death crossover concepts alongside the MACD indicator. EMA 50 (green) and EMA 200 (blue) are the two EMAs. When the green EMA crosses above the blue EMA, the golden crossover signals an uptrend, and the opposite crossover, the death crossover, signals a downtrend. This method suits D1 charts.
Bullish trade scenario
Confirm the bullish trend when:
- The golden crossover occurs between the EMA lines.
- The blue line crosses above the red line in the MACD window.
- MACD green histogram bars appear above the central line.
Entry
When these conditions match, place a buy order.
Stop loss
Place an initial stop loss below the current bullish momentum.
Take profit
Manage your position according to the market context. Your buy order is safe while the golden crossover remains intact. Close the buy order when a MACD bearish crossover occurs or red histogram bars appear below the central line.
Bearish trade scenario
Confirm the bearish trend when:
- The death crossover occurs between the EMA lines.
- The blue line crosses below the red line in the MACD window.
- MACD red histogram bars appear below the central line.
Entry
When these conditions match, place a sell order.
Stop loss
Place an initial stop loss above the current bearish momentum.
Take profit
Manage your position according to the market context. Your sell order is safe while the death crossover remains intact. Close the sell order when a MACD bullish crossover occurs or green histogram bars appear above the central line.
Pros and cons
| Pros | Cons |
|---|---|
| It applies to many trading instruments. | It only shows the market context according to historical movement. |
| It allows both short-term and long-term trading positions. | Any MA strategy can fail due to fundamental reasons. |
| The MA crossover is a standard technique for financial traders. | Some investors argue the MA is not a good predictor of future movement, as the market has no memory and price changes occur for many other reasons. |
Final thought
The moving average is a core element of financial trading that most traders use. Apply it to the chart with caution. There is no substitute for appropriate money management and risk management in any trading strategy.